The Basics#
Getting Help#
There are a few different communication channels that you can make use of in order to ask for help:
We’ll quickly outline how each of these should be used, and also which question is most appropriate for which context.
Discord Server
The discord server is most suitable for very quick and simple questions. These questions should always be asked in the correct channel. There is a tendency to use the general landing channel for everything. This isn’t the end of the world, but if many unrelated messages come flying into the general channel, then it does make it very hard to keep track of the different discussions, and it makes it less likely that you will receive a response. For example, if you are applying for an internship, then you should make use of the internship channels, and not the general channel for your questions.
Issues
As the name suggests, the issues section on GitHub is the best place to raise issues or general bugs that you find with the project. It can also serve as a useful place to ask questions, but only if you suspect that the behaviour you are observing might be a bug.
Video
ToDo List Issues#
We make extensive use of ToDo list issues, which act as placeholders for tracking many related sub-tasks in a ToDo list.
We have a clear process for contributors to engage with such ToDo lists:
Find a task to work on which (i) is not marked as completed with a tick (ii) does not have an issue created and (iii) is not mentioned in the comments. Currently, there are three open tasks: Fixing Failing Tests, Function Formatting, Frontend APIs and Ivy Experimental API.
Create a new issue with the title being just the name of the sub-task you would like to work on.
Comment on the ToDo list issue with a reference to your new issue like so:
- [ ] #Issue_numberFor example, if your issue number is 12345, then the text of your comment should be
- [ ] #12345. You could also use just the issue number (#12345), or a link to the issue itself (https://github.com/unifyai/ivy/issues/12345).At some point after your comment is made, your issue will automatically be added to the ToDo list and the comment will be deleted. No need to wait for this to happen before progressing to the next stage. Don’t comment anything else on these ToDo issues, which should be kept clean with comments only as described above.
Start working on the task, and open a PR as soon as you have a full or partial solution, when you open the PR make sure to follow the conventional commits format, and then directly reference the issue in the pull request by adding the following content to the description of the PR:
Close #Issue_numberThis is important, so that the merging of your PR will automatically close the associated issue. Make sure this is in the description of the PR, otherwise it might not link correctly. If you have a partial solution, the Ivy team can help to guide you through the process of getting it working 🙂 Also, remember to make the PR name well described and if there are some details that can support your changes add them to the description of the PR.
Wait for us to review your PR. Once we have reviewed your PR we will either merge or request changes. Every time you respond to our requested changes you must re-request a review in order for us to re-engage with the PR.
Once the PR is in good shape, we will merge into main, and then you become an Ivy contributor!
In order to keep our ToDo lists moving quickly, if your PR is not created within 7 days of creating the issue, then a warning message will appear on the issue. If another 7 days pass without any changes, the issue will be closed and the task will be made free for others in the community. Likewise, if we have requested changes on your PR, and you do not respond and request a new code review within 7 days, then a warning message will appear on the PR. If another 7 days pass without any changes, then the PR and the associated issue will be closed, and the task will be freed for others in the community. Even if you do not make code changes, you should request a new code review to flag to us that our attention is again needed to further the discussion.
The purpose of this is to ensure our ToDo lists remain accessible for all in the community to engage with, where priority is given to those who can engage on a more short-term basis. We want to avoid the situation where tasks are allocated but then are not acted upon for long periods of time, while preventing others in the community from working on these instead.
Starting an issue and then being unable to complete it is not a problem from our side at all, we automatically close these just so we can keep our community engaged with these tasks 🙂
Our automatic closing is obviously never a reflection on the quality of the PR or the developer who made it, or any reflection of hypothetical frustration we have for more delayed response times etc. Developers are of course very busy people, and sometimes there is not as much free time available as initially thought. That’s totally fine. Please don’t take it personally if your issue or PR gets closed because of this 7-day inactivity time limit.
Reach out to me on discord if at any point you believe this happened to you unfairly, and we will definitely investigate!
Finally, we limit the maximum number of open and incomplete sub-task issues to three per person.
This is to prevent anyone from self-allocating many sub-tasks, preventing others in the community from engaging, and then not being able to complete them.
Even though the limit is three, sub-tasks should only be self-assigned using one comment per sub-task.
For example, a sequence of comments like this - [ ] #Issue_number will register correctly whereas a single comment like this - [ ] #Issue_number, - [ ] #Issue_number, - [ ] #Issue_number or this - [ ] #Issue_number #Issue_number #Issue_number etc. will not.
Video
For questions, please reach out on discord in the todo list issues thread!
Managing Your Fork#
When contributing to Ivy, the first step is to create a fork of the repository. Then, it’s best practice to create a separate branch for each new pull request (PR) you create. This can be done using:
git checkout -b name_of_your_branch
The main branch then simply has the role of being kept up to date with upstream. You can create PRs based on the main branch of your fork, but this will make things more complicated if you would then like to create additional PRs in the future.
For keeping any branch on your fork up to date, there is a script in the root folder of the repo scripts/shell/merge_with_upstream.sh.
To update your fork’s branch to the upstream main branch, simply run ./scripts/shell/merge_with_upstream.sh name_of_your_branch.
To update the main branch, this would then be: ./scripts/shell/merge_with_upstream.sh main.
When making a PR (explained in the next sub-section), sometimes you will see that changes to upstream have caused conflicts with your PR. In this case, you will need to either resolve these conflicts in the browser, or clone your fork and make changes locally in the terminal and push once resolved. Both of these cases are explained in the following video.
You may find that once you have made changes locally and try pulling from main, the pull request is aborted as there are merge conflicts.
In order to avoid tedious merge conflict resolution, you can try ‘stashing’ your local changes, then pulling from main.
Once your branch is up-to-date with main, you can reinstate the most recently stashed changes, commit and push to main with no conflicts.
The corresponding commands are git stash -> git fetch -> git pull -> git stash apply stash@{0}.
Note that this only works for uncommitted changes (staged and unstaged) and untracked files won’t be stashed.
For a comprehensive explanation of git stashing, check out this Atlassian tutorial.
Video
For questions, please reach out on discord in the fork management thread!
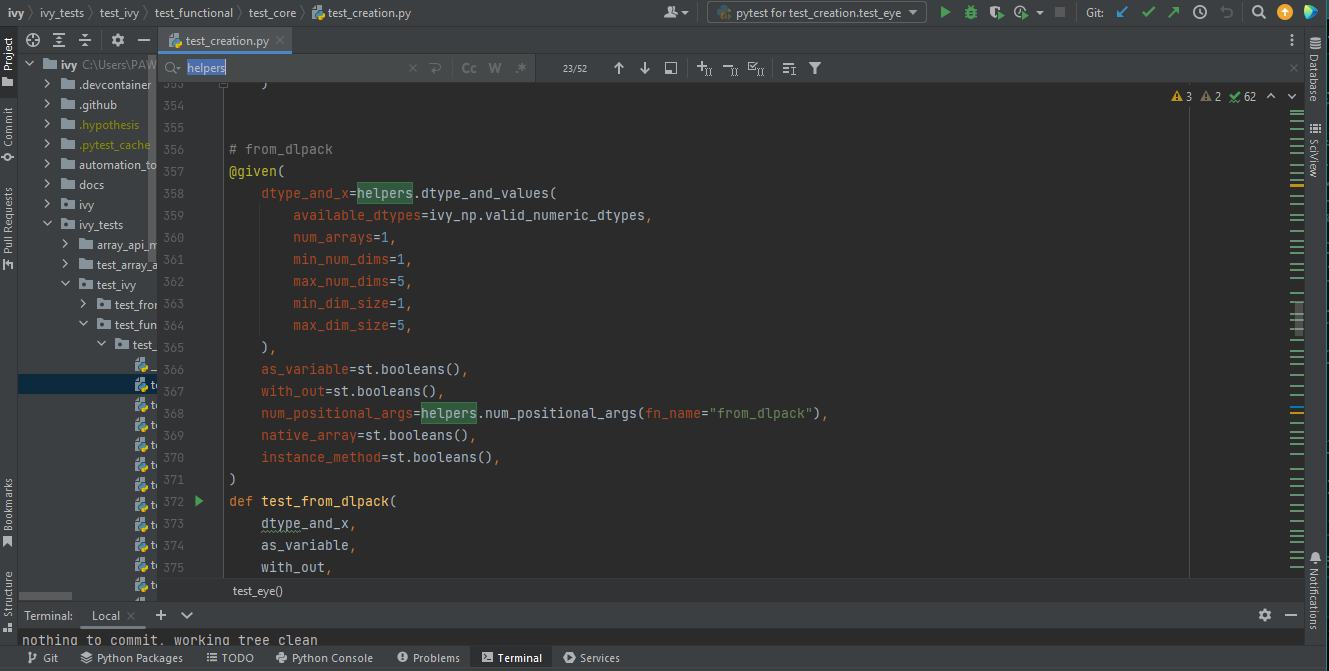
Who To Ask#
When raising issues on the Ivy repo, it can be useful to know who in the team wrote which piece of code. Armed with this information, you can then for example directly tag (using @) the member of the team who worked on a particular piece of code, which you are trying to understand, or you would like to ask questions about.
Here we describe a workflow to help navigate this question of “who to ask”.
With Command Line:#
git blame - Show what revision and author last modified each line of a file
git log - Show commit logs
# Eg: From line 16 to next 5 lines since past 2 weeks
git blame --since=2.weeks -L 16,+5 <filepath> | grep -v "^\^"
# Deeper look at what each author changed in files retrieved from the above step
git log <commit_id> -p
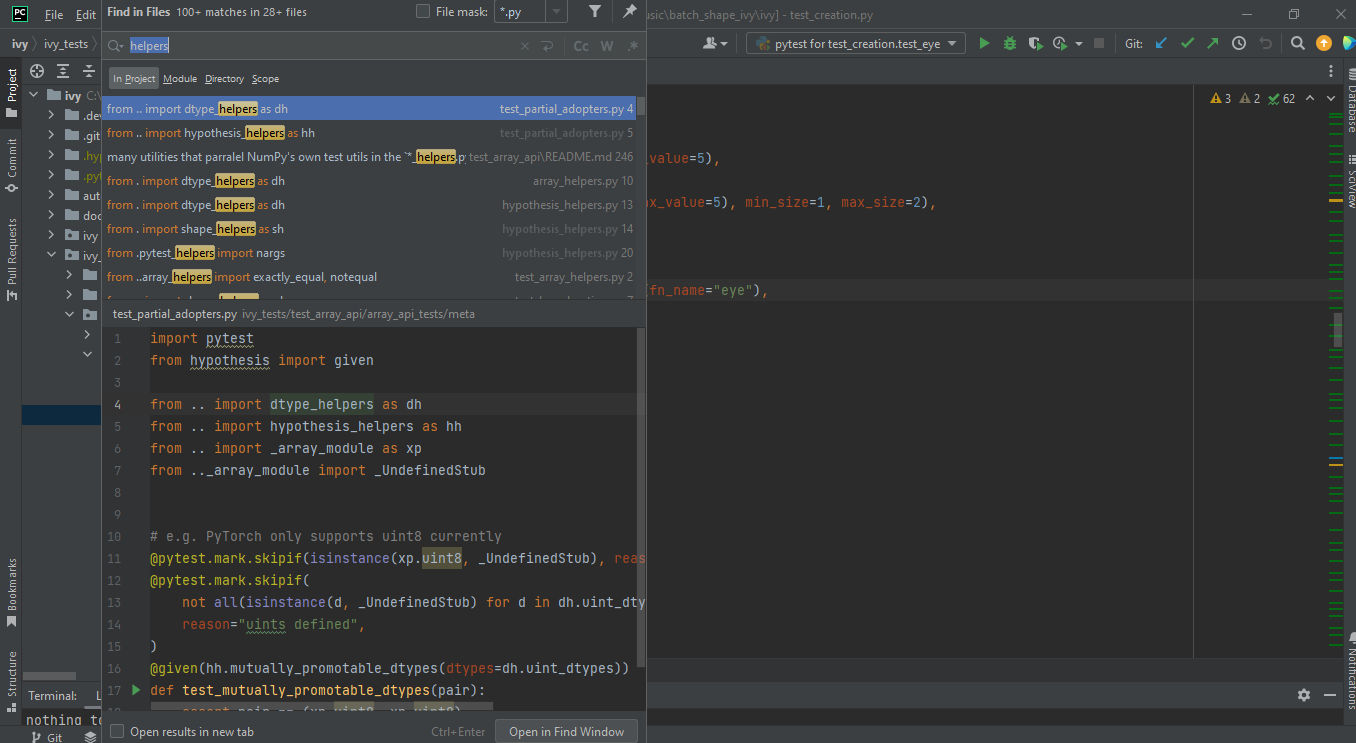
With Browser:#
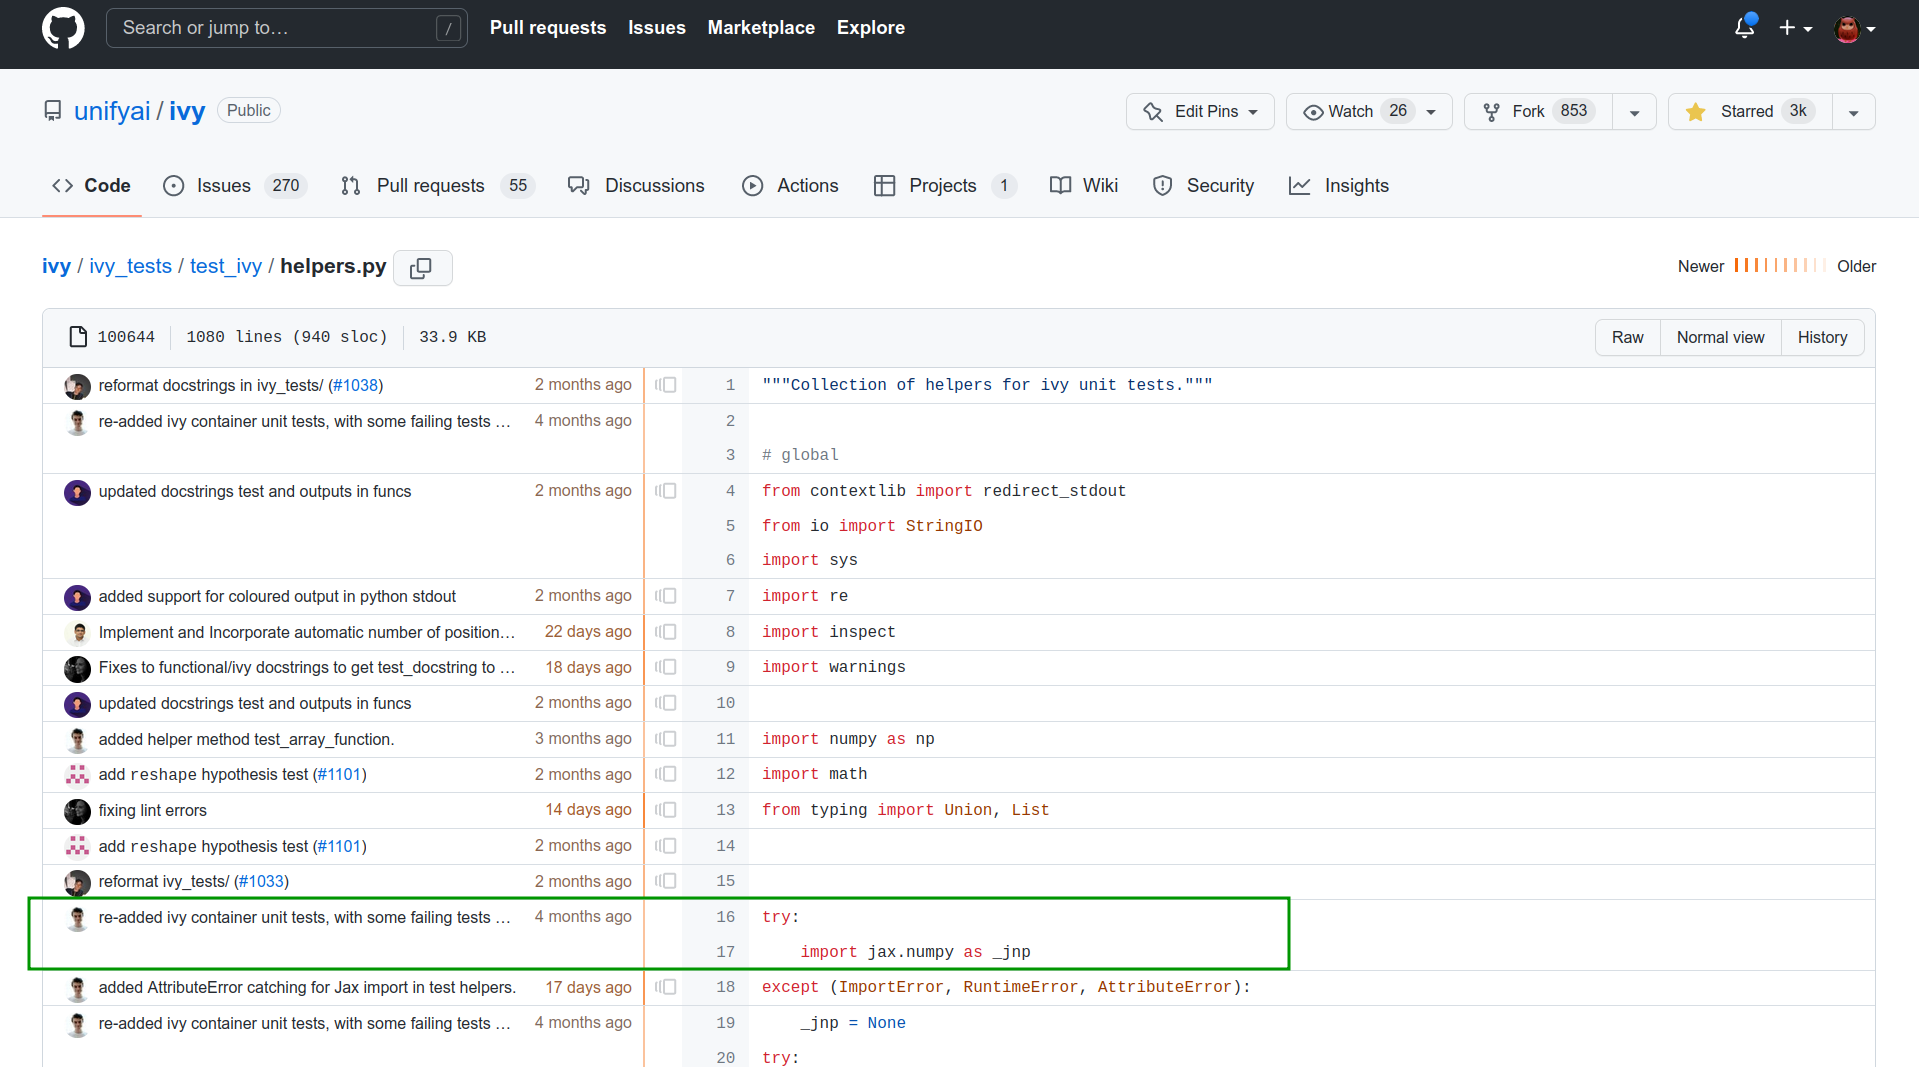
Git Blame View is a handy tool to view the line-by-line revision history for an entire file, or view the revision history of a single line within a file.
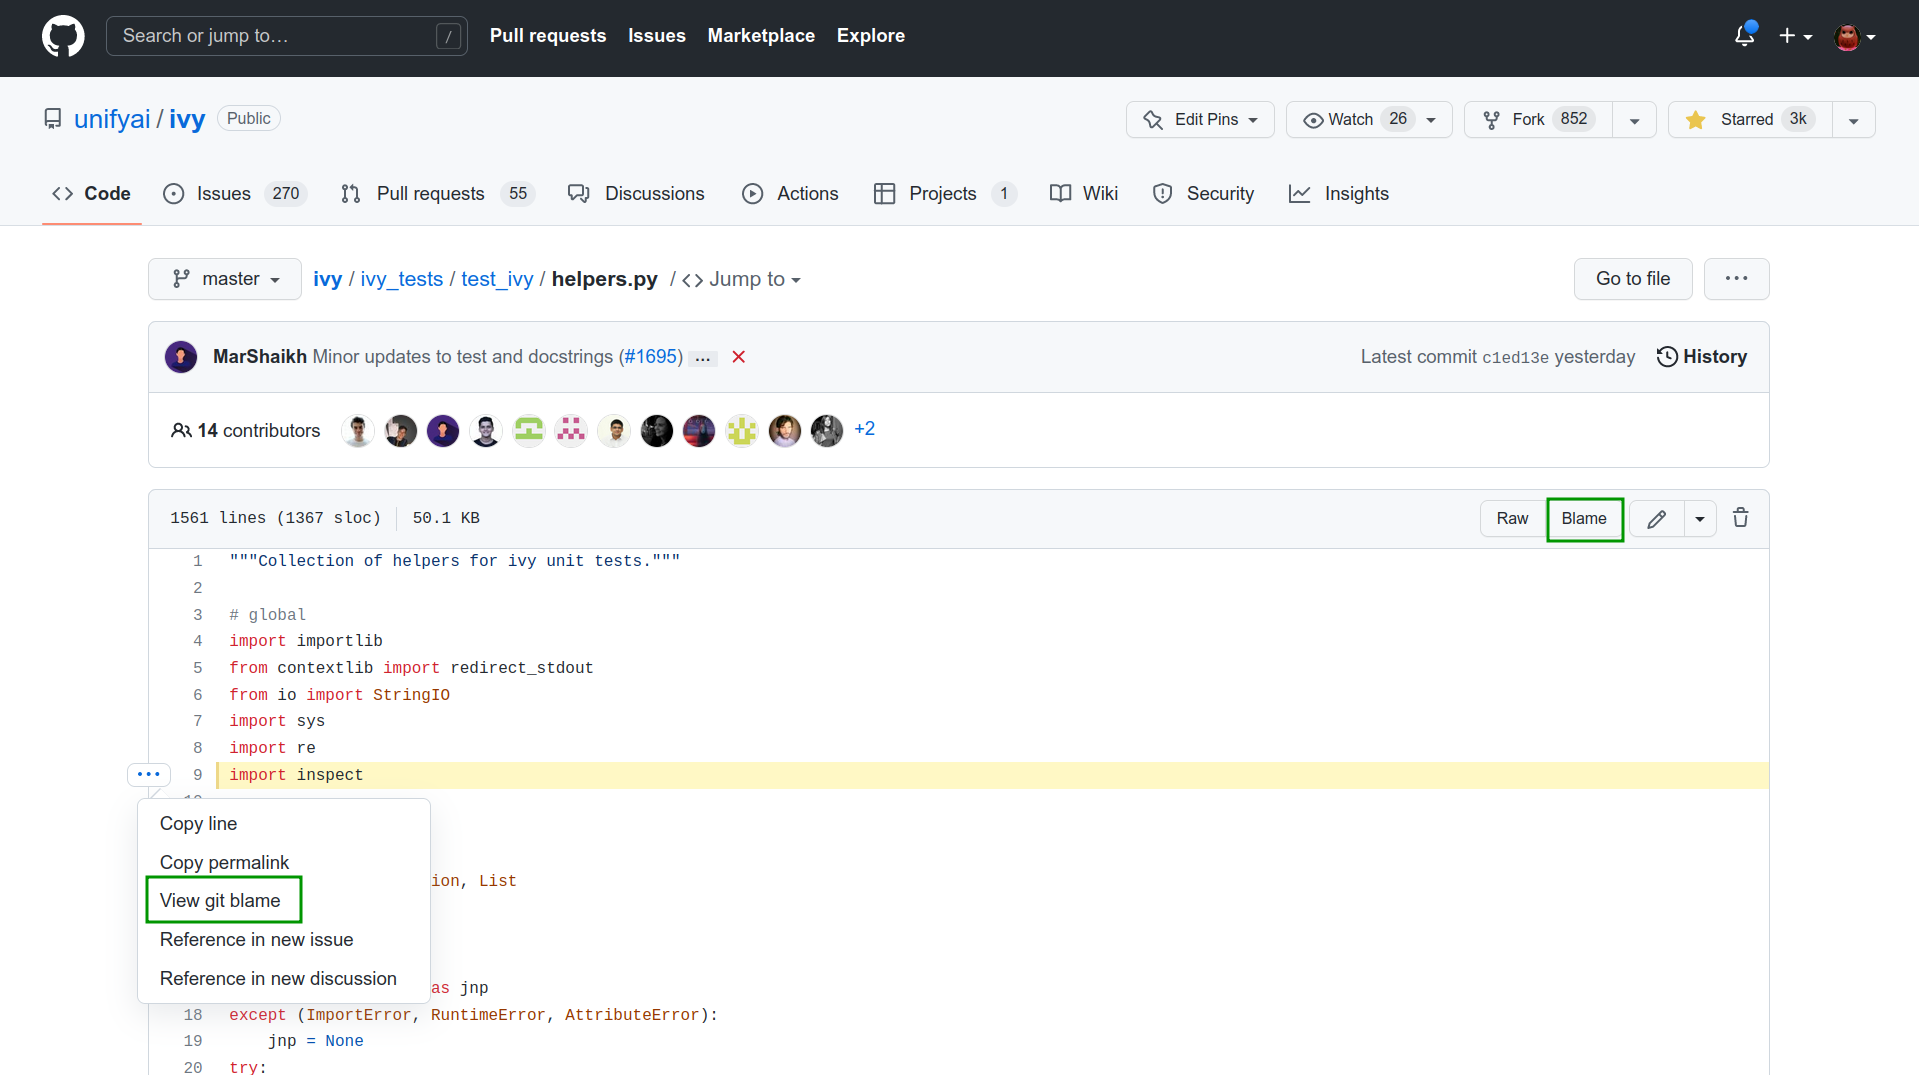
This view can be toggled from the option in left vertical pane, or from the “blame” icon in top-right, as highlighted above.
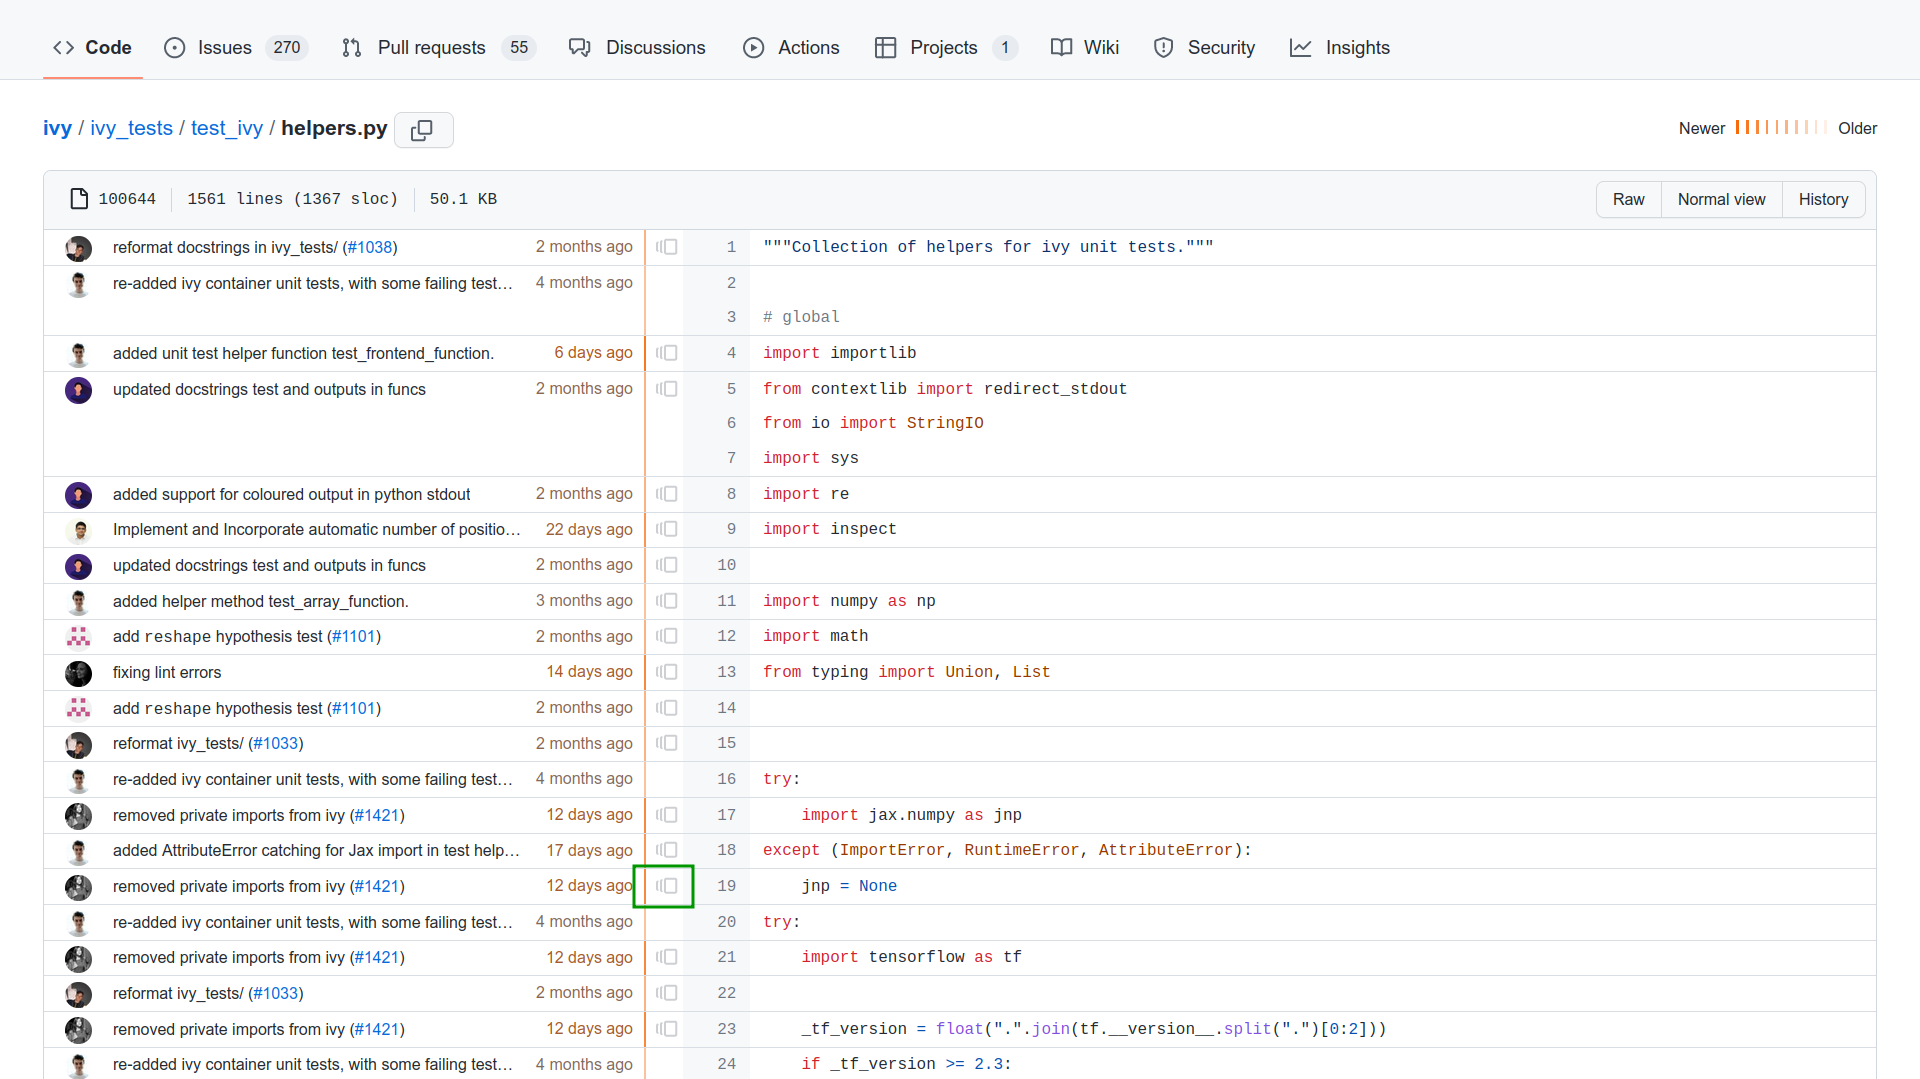
Each time you click the highlighted icon, the previous revision information for that line is shown, including who committed the change and when this happened.
Whenever starting a discussion or creating an issue, you are very welcome to tag members of the Ivy team using “@”, selecting the person you think would be most suitable to interact with, based on the information gained from the above steps.
Pull Requests#
Our process for responding to pull requests is quite simple. All newly created PRs will be reviewed by a member of the team, and then the PR will either be merged or changes will be requested. In order for us to look at the changes you have made, you will then need to request a code review once you have addressed our requested changes. We will then take another look, and either merge the PR or request further changes. This process then will repeat until either the PR is closed by us or yourself, or the PR is merged.
If we request changes, you make those changes, but you do not request a code review, then we will likely not check the changes. This is the case even if you comment on the PR. This simple process makes it much simpler for us to track where and when our attention is needed.
Note that you cannot request a code review until you have already received at least one review from us. Therefore, all new PRs will receive a code review, so please just wait and we will check out and review your newly created PR as soon as possible! Your PR will never be closed until we have provided at least a code review on it.
After a new PR is made, for the tests to run, it needs an approval of someone from the ivy team for the workflows to start running. Once approved, you can see the failing and passing checks for a commit relevant to your PR by clicking on the ❌ or ✔️ or 🟤 (each for: one or more tests are failing, all tests are passing, the check has just started, respectively) icon next to the commit hash.

Further, if you click on the details next to a check then you can see the logs for that particular test.

Also, if you have pushed multiple commits to a PR in a relatively short time, you may want to cancel the checks for a previous commit to speedup the process, you can do that by going to the log page as described above and clicking on the Cancel Workflow button.
Note that this option might be unavailable depending on the level of access that you have.

Finally, all PRs must give write access to Ivy maintainers of the branch. This can be done by checking a tickbox in the lower right corner of the PR. This will enable us to quickly fix conflicts, merge with upstream, and get things moving much more quickly without us needing to request very simple fixes from yourself.
The code review process is explained in more detail in the following video.
Video
For questions, please reach out on discord in the `pull requests thread`_!
Small Commits Often#
Sometimes, you might want to try any make substantial improvements that span many files, with the intention of then creating one very large PR at the end in order to merge all of your changes.
While this is generally an acceptable approach when working on software projects, we discourage this approach for contributions to Ivy.
We adopt a philosophy where small, incremental, frequent commits are much more valuable to us and the entire Ivy developer community, than infrequent large commits.
This is for a few reasons:
It keeps everyone up to date and on the same page as early as possible.
It avoids the case where multiple people waste time fixing the same problem.
It enables others to spot mistakes or conflicts in proposals much earlier.
It means you avoid the mountain of conflicts to resolve when you do get around to merging.
This is also why we advocate using individual pull-requests per issue in the ToDo list issues. This keeps each of the commits on main very contained and incremental, which is the style we’re going for.
Sometimes, you’ve already dived very deep into some substantial changes in your fork, and it might be that only some of the problems you were trying to fix are actually fixed by your local changes.
In this hypothetical situation, you should aim to get the working parts merged into main as soon as possible.
Adding subsections of your local changes with git is easy.
You can add individual files using:
git add filepath
You can also enter an interactive session for adding individual lines of code:
git add -p filepath  # choose lines to add from the file
get add -p           # choose lines to add from all changes
When in the interactive session, you can split code blocks into smaller code blocks using s.
You can also manually edit the exact lines added if further splitting is not possible, using e.
Check the git documentation for more details.
As a final note, a beautiful commit history is not something we particularly care about. We’re much more concerned that the code itself is good, that things are updated as quickly as possible, and that all developers are able to work efficiently. If a mistake is committed into the history, it’s generally not too difficult to simply undo this in future commits, so don’t stress about this too much 🙂
For questions, please reach out on the on discord in the `commit frequency thread`_!
Interactive Ivy Docker Container#
The advantage of Docker interactive mode is that it allows us to execute commands at the time of running the container. It’s quite a nifty tool which can be used to reassure that the functions are working as expected in an isolated environment.
An interactive bash shell in ivy’s docker container can be created by using the following command,
docker run --rm -it unifyai/ivy bash
The project structure and file-system can be explored. This can be very useful when you want to test out the bash scripts in ivy, run the tests from the command line etc,. In fact, if you only want to quickly test things in an interactive python shell run the following command,
docker run --rm -it unifyai/ivy python3
In both cases, the ivy version at the time when the container was built will be used. If you want to try out your local version of ivy, with all of the local changes you have made, you should add the following mount:
docker run --rm -it -v /local_path_to_ivy/ivy/ivy:/ivy/ivy unifyai/ivy bash
This will overwrite the ivy subfolder inside the ivy repo in the container with the ivy subfolder inside your local ivy repo.
Ivy is installed system-wide inside the container via the command
python3 setup.py develop --no-depsThe
developcommand means that the system-wide installation will still depend on the original source files, rather than creating a fresh copy.Therefore, ivy can be imported into an interactive python shell from any directory inside the container, and it will still use the latest updates made to the source code.
Clearly, running a container in interactive mode can be a helpful tool in a developer’s arsenal.
Running Tests Locally#
With Docker#
- With PyCharm (With or without docker):
PyCharm enables users to run pytest using the green button present near every function declaration inside the
ivy_testsfolder.
Testing can be done for the entire project, individual submodules, individual files, and individual tests. This can be done by selecting the appropriate configuration from the top pane in PyCharm.
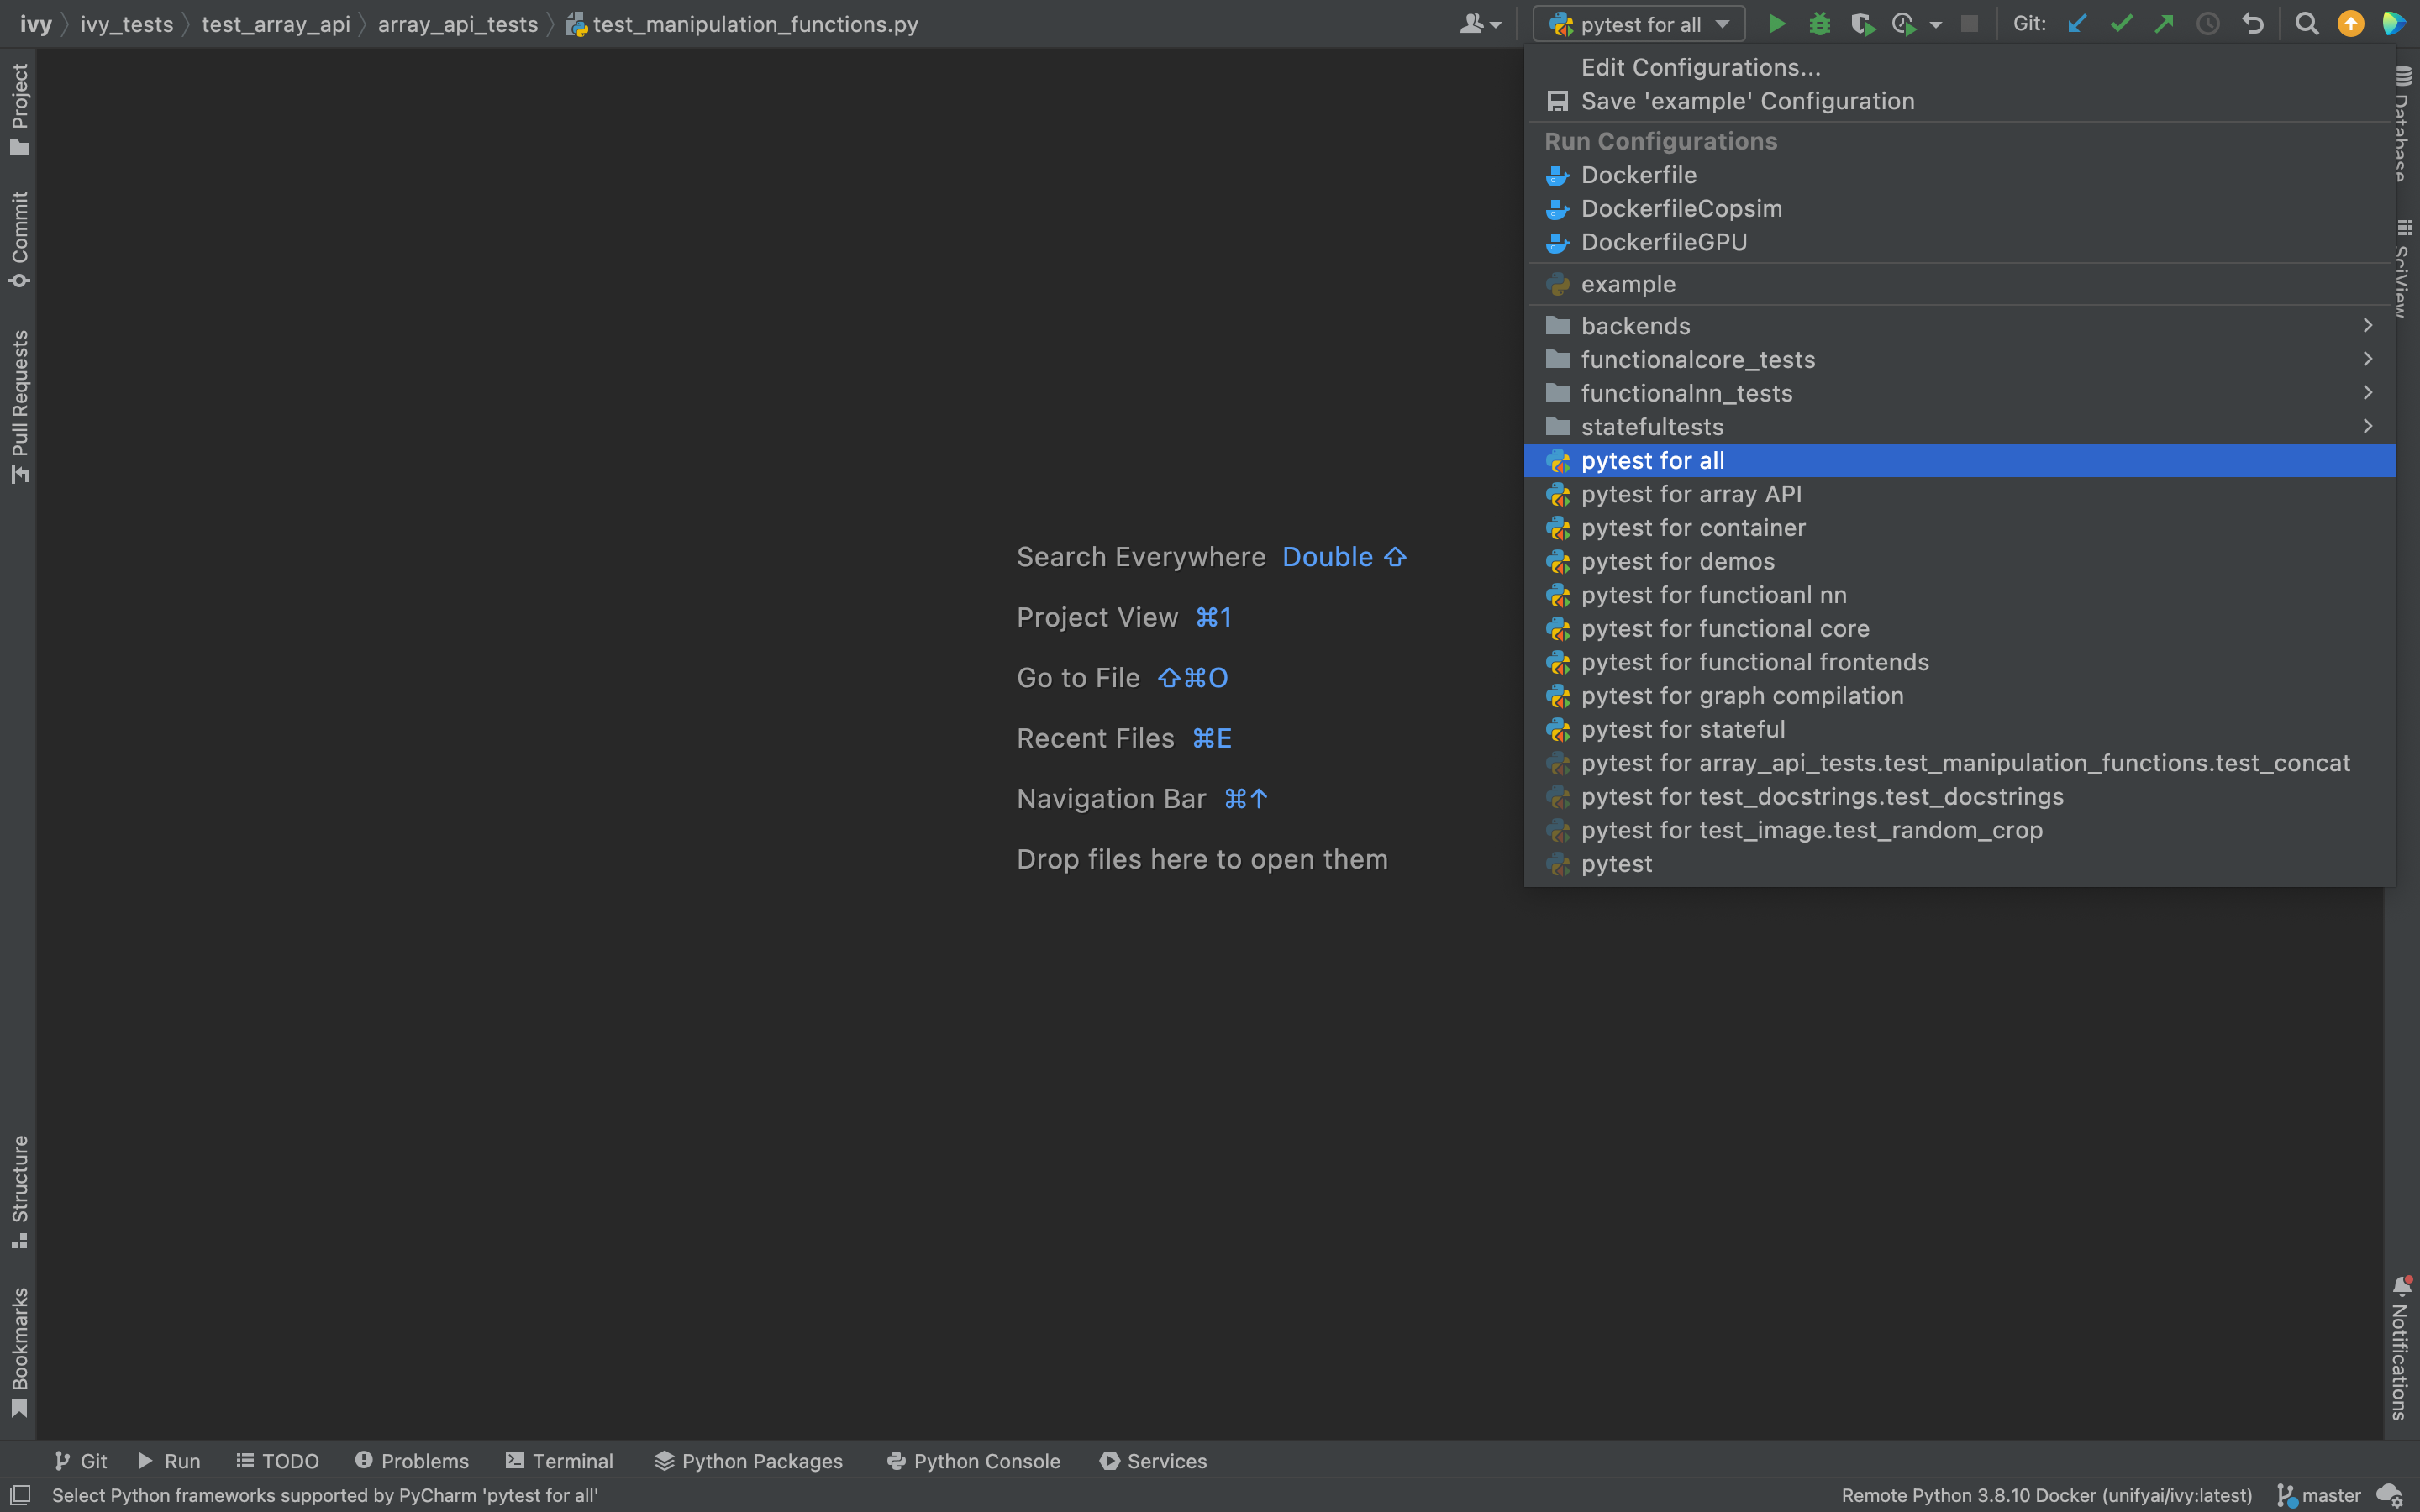
- Through the command line (With docker):
We need to replace the folder inside the container with the current local ivy directory to run tests on the current local code.
docker exec <container-name> rm -rf ivy
docker cp ivy <container-name>:/
We need to then enter inside the docker container and change into the
ivydirectory using the following command.
docker exec -it ivy_container bash
cd ivy
Run the test using the pytest command.
Ivy Tests:
For a single function:
pytest ivy_tests/test_ivy/test_functional/test_core/test_image.py::test_random_crop --no-header --no-summary -q
For a single file:
pytest ivy_tests/test_ivy/test_functional/test_core/test_image.py --no-header --no-summary -q
For all tests:
pytest ivy_tests/test_ivy/ --no-header --no-summary -q
Array API Tests:
For a single function:
pytest ivy_tests/array_api_testing/test_array_api/array_api_tests/test_creation_functions.py::test_arange --no-header --no-summary -q
For a single file:
pytest ivy_tests/array_api_testing/test_array_api/array_api_tests/test_creation_functions.py --no-header --no-summary -q
For all tests:
pytest ivy_tests/array_api_testing/test_array_api/ --no-header --no-summary -q
For the entire project:
pytest ivy_tests/ --no-header --no-summary -q
- Through the command line (Without docker):
We need to first enter inside the virtual environment.
ivy_dev\Scripts\activate.bat
(on Windows)
OR
source ivy_dev/bin/activate
(on Mac/Linux)
Run the test using the pytest command.
Ivy Tests:
For a single function:
python -m pytest ivy_tests/test_ivy/test_functional/test_core/test_image.py::test_random_crop --no-header --no-summary -q
For a single file:
python -m pytest ivy_tests/test_ivy/test_functional/test_core/test_image.py --no-header --no-summary -q
For all tests:
python -m pytest ivy_tests/test_ivy/ --no-header --no-summary -q
Array API Tests
For a single function:
python -m pytest ivy_tests/array_api_testing/test_array_api/array_api_tests/test_creation_functions.py::test_arange --no-header --no-summary -q
For a single file:
python -m pytest ivy_tests/array_api_testing/test_array_api/array_api_tests/test_creation_functions.py --no-header --no-summary -q
For all tests:
python -m pytest ivy_tests/array_api_testing/test_array_api/ --no-header --no-summary -q
For the entire project
python -m pytest ivy_tests/ --no-header --no-summary -q
- Optional Flags: Various optional flags are available for running the tests such as
device,backend, etc. device:This flag enables the setting of the device where the tests would be run.
Possible values being
cpuandgpu.Default value is
cpu
backend:This flag enables running the tests for particular backends.
The values of this flag could be any possible combination of JAX, numpy, tensorflow, and torch.
Default value is
jax,numpy,tensorflow,torch.
num-examples:Set the maximum number of examples to be generated by Hypothesis.
The value of this flag could be any positive integer value that is greater than 1.
Default value is
5.
- Optional Flags: Various optional flags are available for running the tests such as
Getting the most out of IDE#
with PyCharm#
- Find a text:
Ctrl+Fwill prompt you to type in the text to be found, if not already selected, and then find all the instances of text within the current file.
Ctrl+Shift+Fwill find all the instances of text within the project.
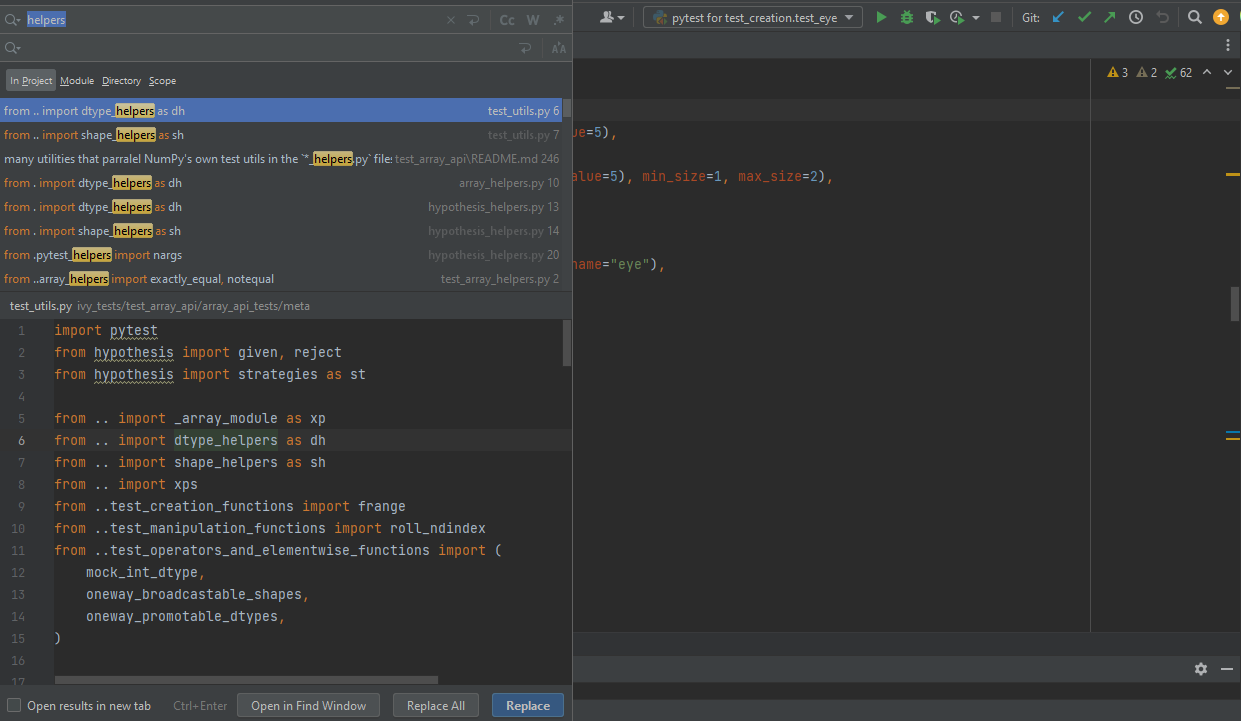
- Find+Replace a text:
Ctrl+Rwill prompt you to type in the text to be found and the text to be replaced, if not already selected, within the current file.
Ctrl+Shift+Rwill prompt you to type in the text to be found and the text to be replaced, if not already selected, within the whole project.
- Find and multiply the cursor:
Ctrl+Shift+Alt+Jwill find all the instances of the selected text and multiply the cursor to all these locations.
You can visit Pycharm Blog for more details on efficient coding!
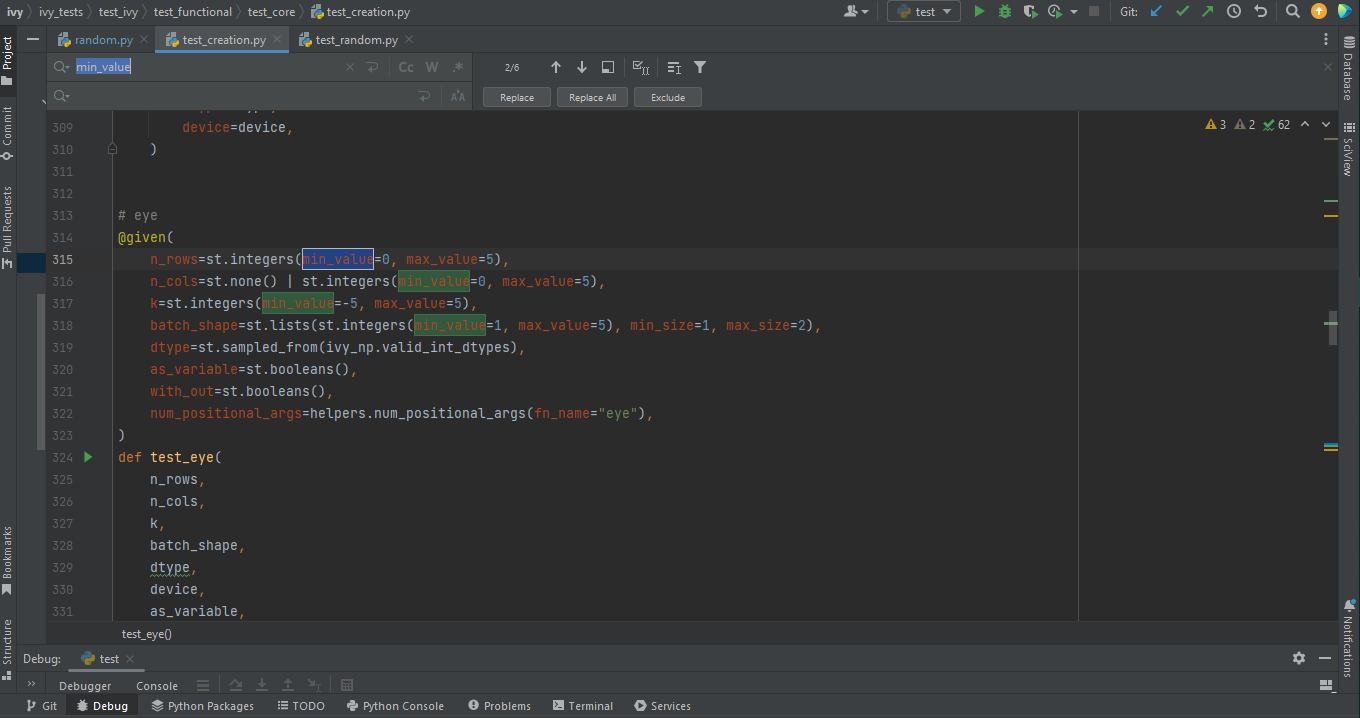
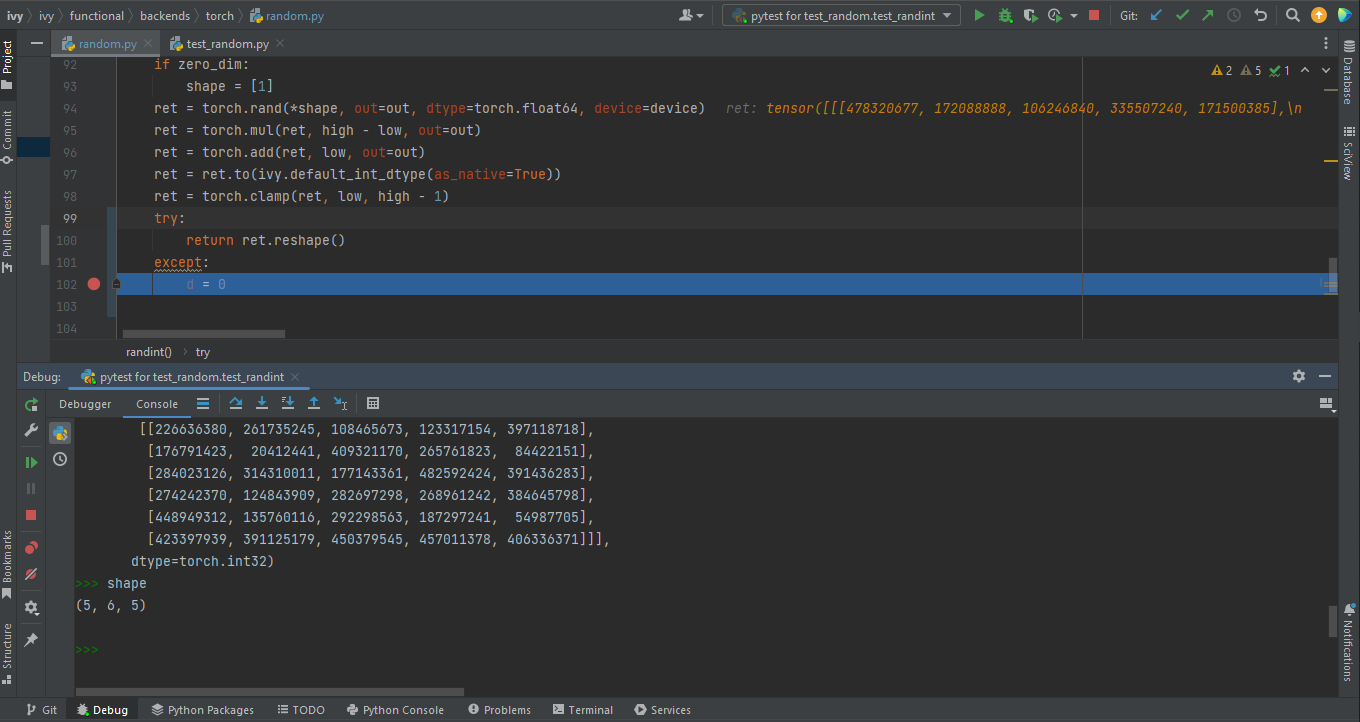
- Debugging:
- add breakpoints:
Click the gutter at the executable line of code where you want to set the breakpoint or place the caret at the line and press
Ctrl+F8
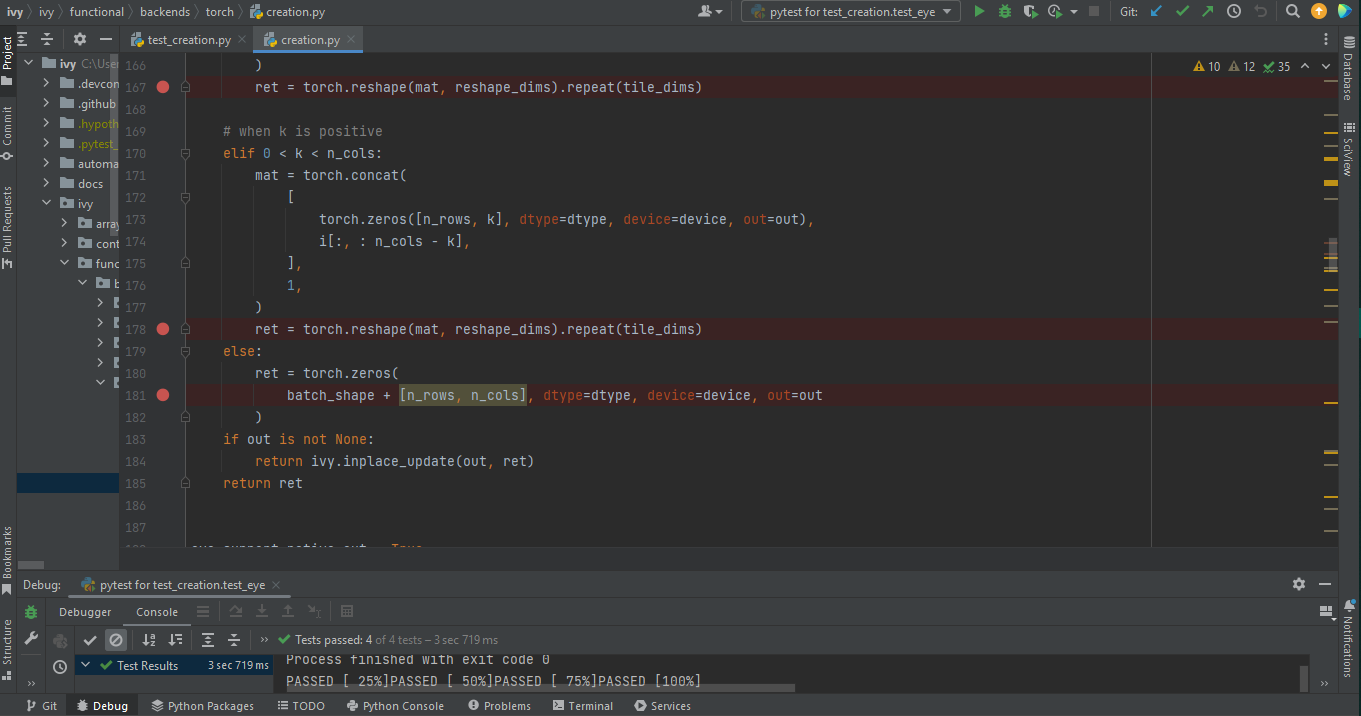
- Enter into the debug mode:
1. Click on Run icon and Select Debug test or press
Shift+F9. This will open up a Debug Window Toolbar:
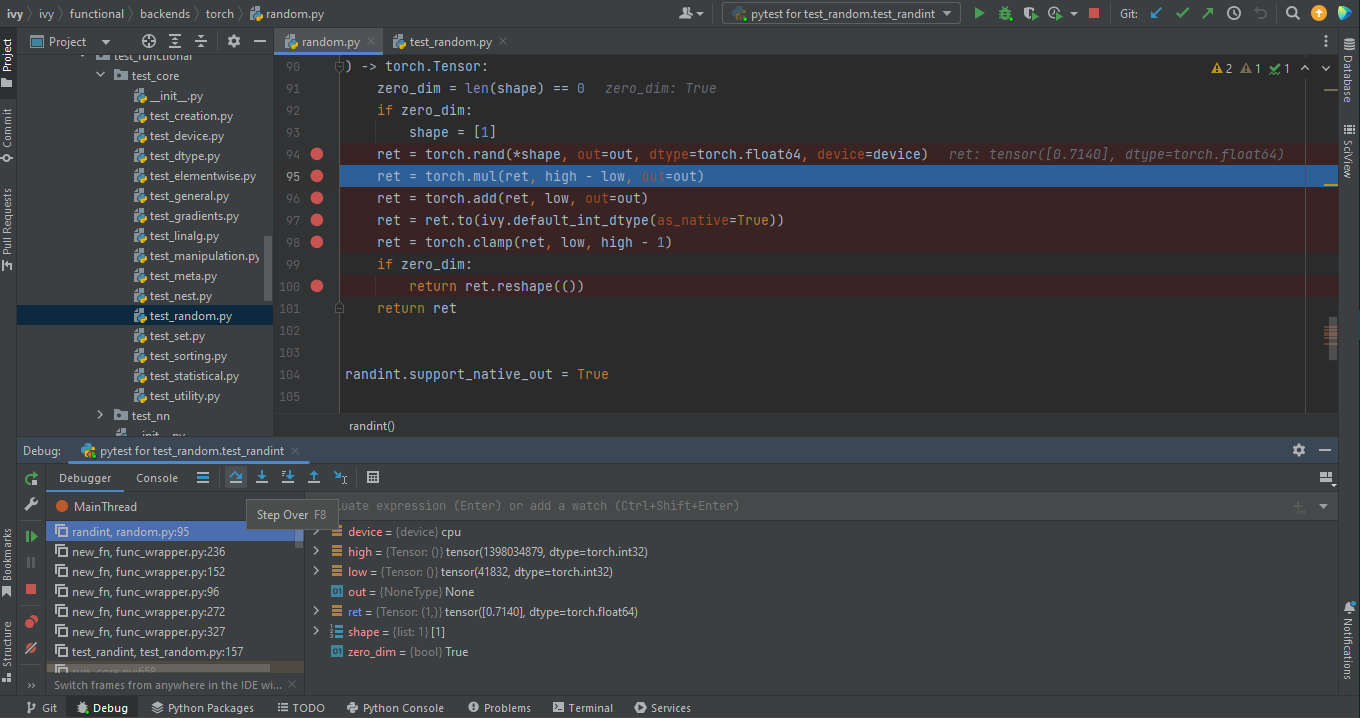
- Stepping through the code:
- Step over:
Steps over the current line of code and takes you to the next line even if the highlighted line has method calls in it.
Click the Step Over button or press
F8
- Step into:
Steps into the method to show what happens inside it. Use this option when you are not sure the method is returning a correct result.
Click the Step Into button or press
F7- Smart step into:
Smart step into is helpful when there are several method calls on a line, and you want to be specific about which method to enter. This feature allows you to select the method call you are interested in.
Press
Shift+F7. This will prompt you to select the method you want to step into:
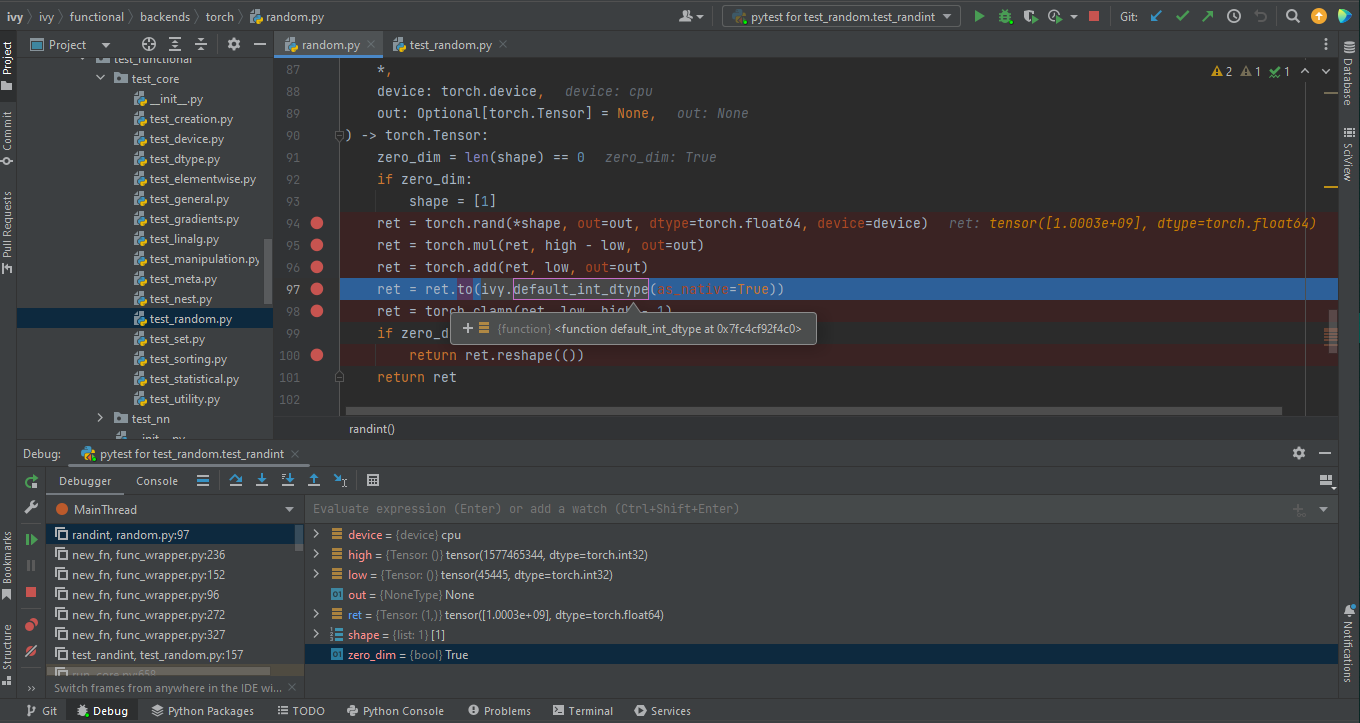
Click the desired method.
- Python Console:
- Click the Console option on Debug Tool Window:
This currently stores variables and their values upto which the code has been executed. You can print outputs and debug the code further on.
- If you want to open the console at a certain breakpoint:
Select the breakpoint-fragment of code, press
Alt+shift+EStart debugging!
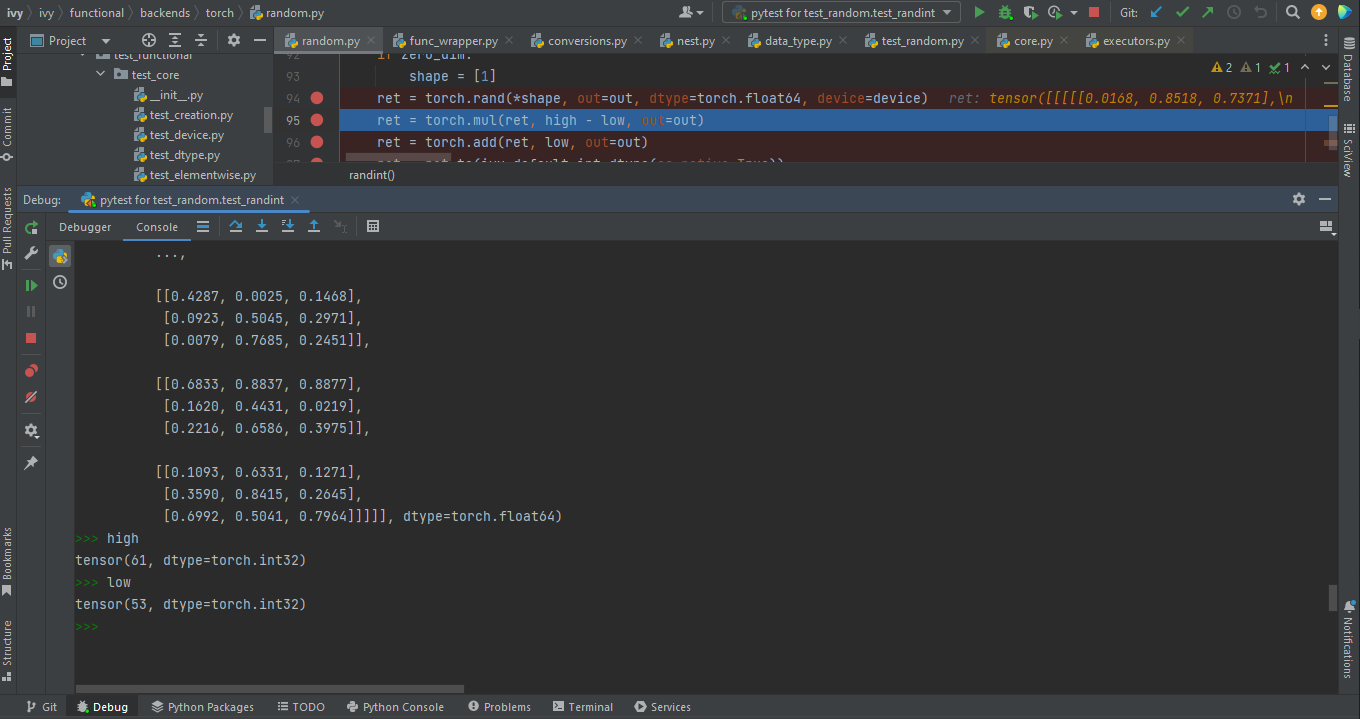
- Using try-except:
PyCharm is great at pointing the lines of code which are causing tests to fail. Navigating to that line, you can add Try-Except block with breakpoints to get in depth understanding of the errors.
- Dummy test file:
Create a separate dummy
test.pyfile wherein you can evaluate a particular test failure. Make sure you don’t add or commit this dummy file while pushing your changes.
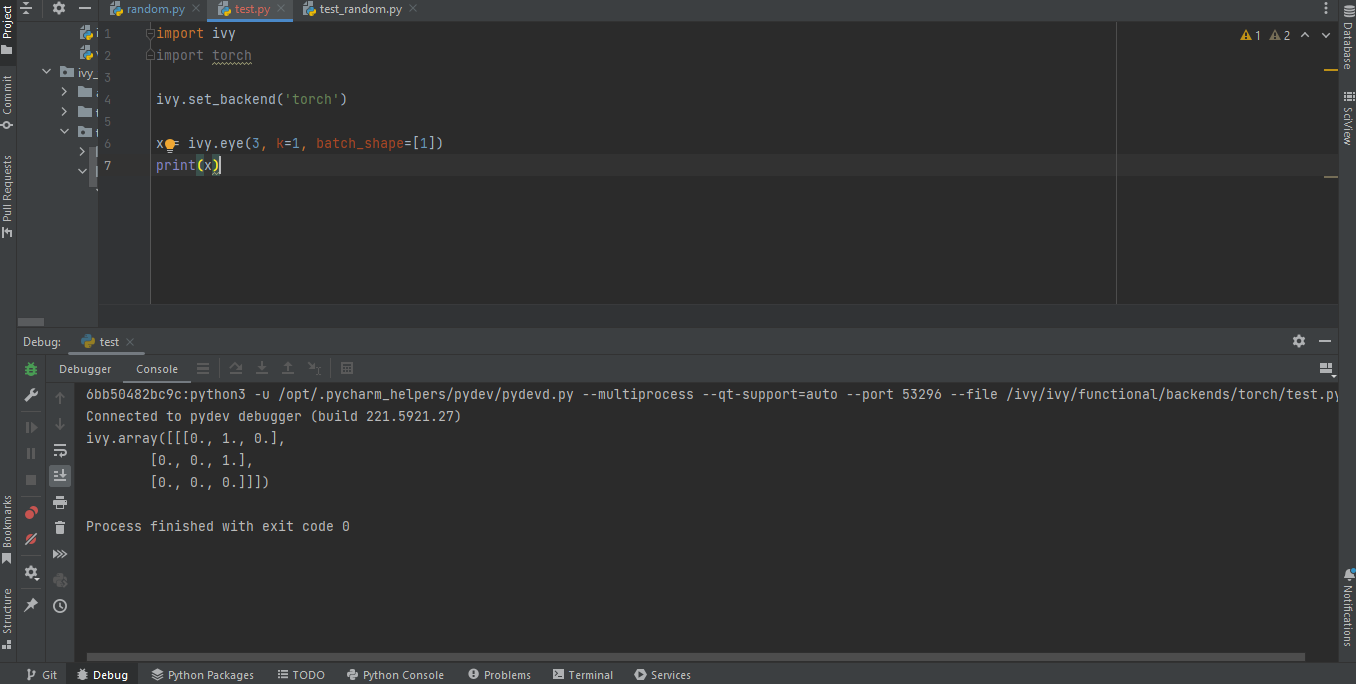
PyCharm has a detailed blog on efficient Debugging which is quite useful.
Round Up
This should have hopefully given you a good understanding of the basics for contributing.
If you have any questions, please feel free to reach out on discord in the todo list issues thread, fork management thread, `pull requests thread`_, depending on the question!